This is the second generation pistol. The one I made last year was both simpler and more complex. Last year I cut a handle out of MDF and used a Teensy 2.0 to generate a noise when the laser was active. It looked okay. This one is better.
- 3D printed handle, nicer shape, more detailing etc
- Blinky LEDs to make it more exciting
- A glass barrel. It isn’t actually glass, but it looks like it.
- A charger circuit so I don’t have to take it apart to charge the battery
- A more interesting noise
- Using an Attiny85 rather than a Teensy
The handle was a big deal but it was worth it. I used blender to model my shape in 3D and then got shapeways to print it for me. Fairly pricey when I add freight all the way to NZ, but so much better than MDF.
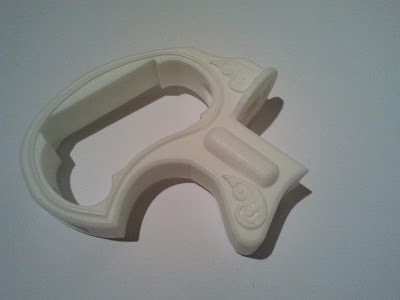
Here’s the handle as it arrived. It might not be too obvious that this is a gun handle but it will come clear soon enough.
The handle is hollow to accommodate the battery and it has a ridge around the edge so the pearl inset I’m adding will fit snugly. There are two curly bits I’m rather pleased with. It took some fairly fine detail work in blender to get those right and they turned out pretty good. Getting detail that fine with MDF is, of course, impossible. MDF just tears and you cannot carve it.
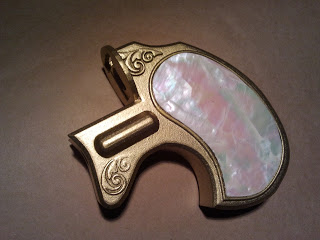
The next step was to paint it so it looks like metal, and you can see how those curly bits look pretty cool. This picture also shows the pearl insert in the handle.
I also want to mention the raised lozenge shape just above the lower curly bit. There’s a wide hole through the structure underneath that and I wanted to add some strength to it at that point. I think the material, now that I’ve actually handled it, didn’t need it. But these are the kinds of decisions you can make with 3D.
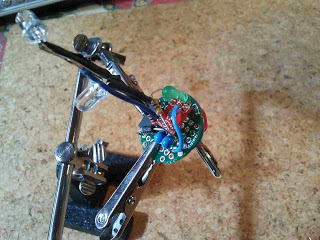
The next picture shows the insides of it held in place by a stand with a couple of claws so I can work on it. There is a round green perf board and you can see the speaker dangling underneath and to the right. Opposite that are some stiff wires with the LEDs attached. There’s another LED, a green one, on the board. This will light when the battery is charging. You can just see the black corner of the Attiny85 IC between the two claws. I chose this angle to conceal my bad soldering. I have a really good soldering iron, it isn’t that. I solder badly anyway.
The code the Attiny85 is running is in a GitHub project.
That also has the 3D model, which I’ve made public on shapeways too.
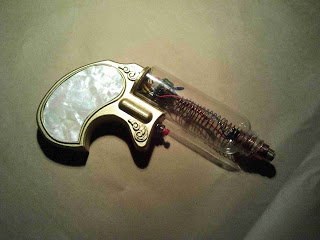
The almost finished gun looks like this. Now you can see the barrel in place and you can also see the round perf board sitting at the base of the barrel. The tiny speaker slots into the top of the handle just behind the barrel. It almost fit but I had to scrape back some material with a knife. The actual laser is that brass thing in the tip of the barrel. All it really needs is that and a battery to be a laser, which would not be nearly as much fun. The barrel is made out of a clear plastic bottle, so it won’t break if dropped. The trigger is a red push button.
The copper coil is decorative only and the LEDs are kind of tangled in amongst it.
Here’s what it looks like in action:
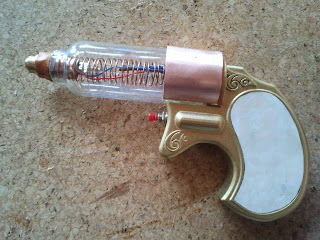
So far the gun has the electronics exposed. What it needs still is some leather to cover the end of the barrel to give it a more steam punk look. The glue around the actual laser at the barrel tip is a bit messy too so I made some covers for both. There’s a thin strip of leather at the tip now, and a copper cover at the other end. So now it looks more steam punk.
The original of this, just so you know where I got the idea, is this classy Derringer. which is a good deal more ornate but much the same shape.

But I was also influenced by one of the guns on Warehouse 13, especially for the glass barrel.
Neither of those are real lasers though.